
M1928 Haversack
The M1928 Haversack was the standard field pack issued to GI’s of the 29th division during the war, this pack had seen service since ww1 and did not go through any dramatic changes in its life time. Original haversacks are quite easy to come by at markets and shows with prices ranging depending on wear and maker marks, for instance British made equipment can sometimes fetch a higher price. Haversacks are not the easiest packs to open and close when you’re in a hurry, however they were used up until 1945 by the 29th Division.
When choosing between a US made pack or a British made pack there is no real difference when it comes to authenticity, they were issued whatever was available at the time. Cheap reproduction haversacks can sometimes only save you £20 over an original but with that money saving comes a dramatic decline in quality and authenticity. The worse of the reproduction packs are usually noticeable by their off colours, ranging from lemon yellow to washed out almost white looking. The canvas used it not of any resemblance to the originals and the clips often break. In some cases the shovel and bayonet eyelets will not be the correct distance from one another making it difficult to attach them. Overall we would strongly recommend avoiding cheap reproduction haversacks at all costs.
When it comes to fitting your pack it is best to have someone assisting you as they will be able to see how the straps hang and adjust them easier. The pack shouldn’t be so tight that you cannot move your arms moreover the pack should hang so low that it reaches your lower back. The most common mistake when fitting a haversack is not securing the 2nd pair of shoulder straps to the D loops located on the bottom of the pack, these loops should be poked through the small fabric slits and then connected as this ensures the pack stays tight.
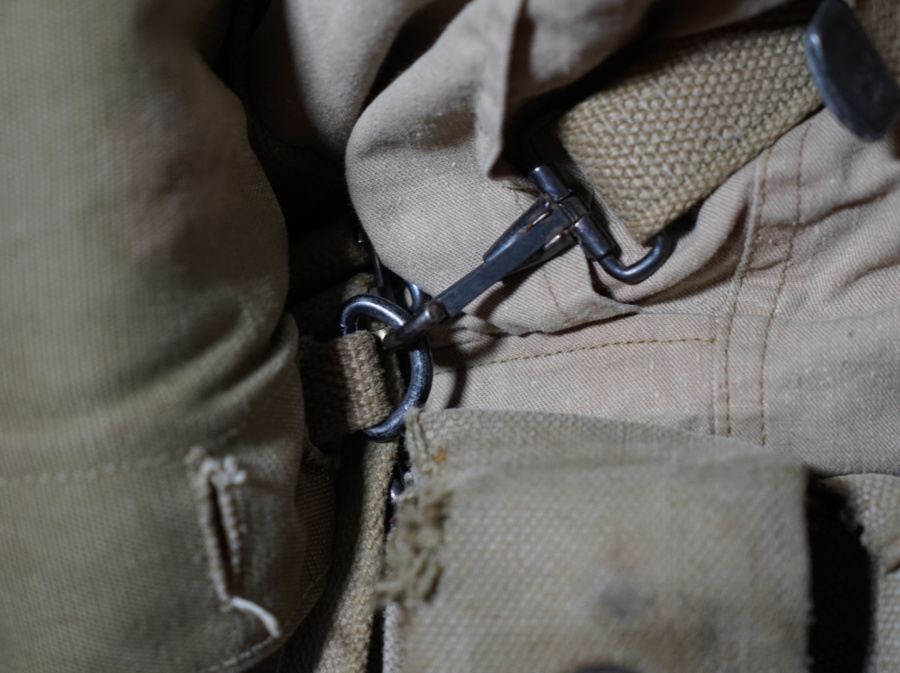
D loop
This ensures that the pack does not sag down which in turn causes the belt to rise too high up at the front.
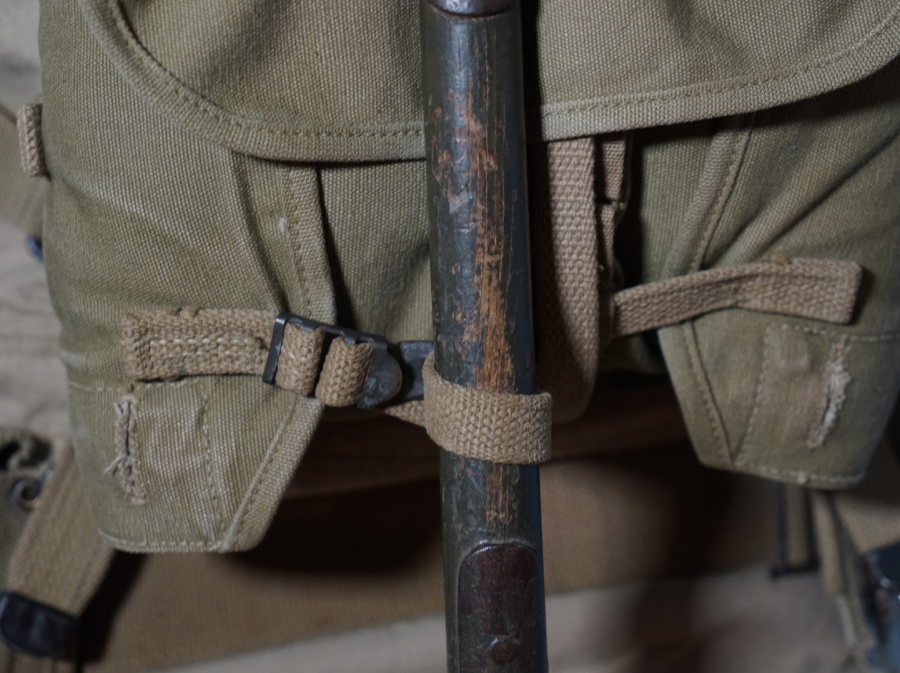
Secure the shovel
This tip can help stop the shovel from bouncing around when running.
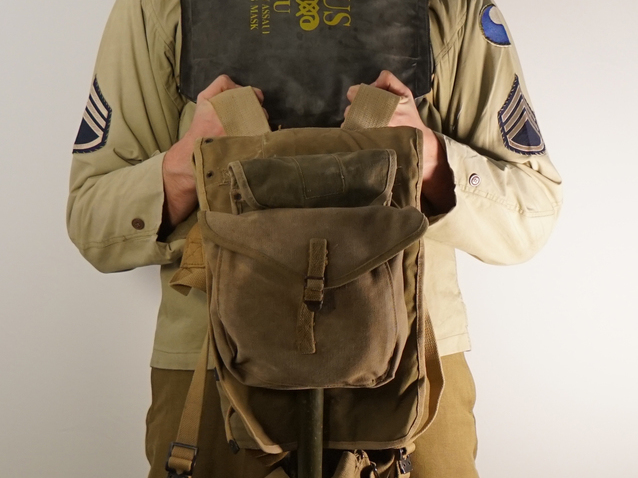
Your pack should be connected to your cartridge belt at the rear and at the front to personal preference but always symmetrical.
When packing the haversack most reenactors will load it with a single wool blanket, this is perfectly acceptable. The blanket should be folded tight and then placed in the centre of the opened out pack, make sure the folded blanket is to a similar size to the pack or else you will not be able to close it correctly.
The tail flap can now be folded over the blanket and the 3 straps of the side flaps fastened. make sure you feed these straps through the eyelet loops on the tail flap as this will ensure the tail does not unfold itself. Now you can tighten/loosen the 3 straps to get the desired shape, too tight and the bag will look as if it is folding in on itself causing stress on the stitching, too loose and the pack will look scruffy. Once satisfied you can connect the top flap via the long strap at the bottom of the pack, use this moment to squash any remaining blanket that might be showing out the top. Secure the top flap ensuring it is not too tight as this can cause the pack to fold causing discomfort when wearing it.
You can now fix the meat can pouch by feeding the straps through the D loops. As with reproduction haversacks the same apples to meat can pouches, reproduction pouches are of a similar strange colour unless purchased from a reputable source. In most cases a decent reproduction pouch can cost the same if not more than an original. Always talk to your NCO’s if you are unsure of an item you are thinking of purchasing.
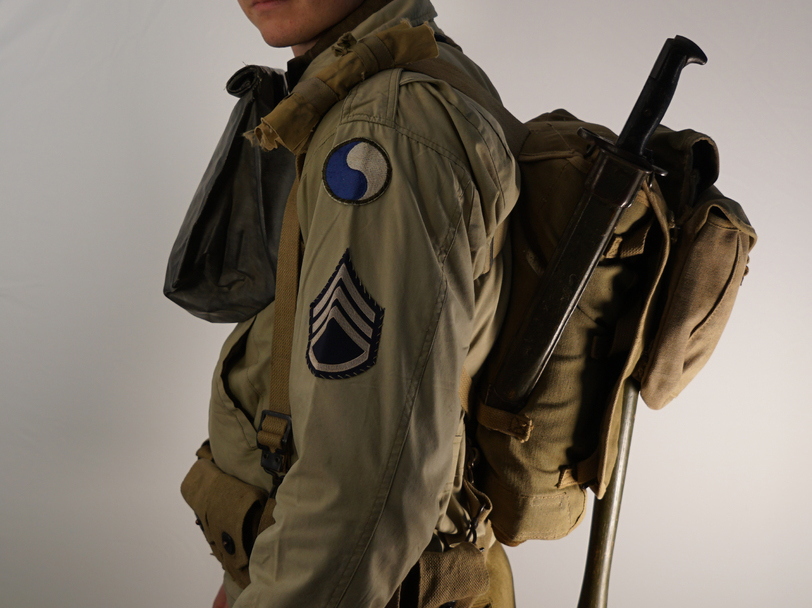
Once your pack is assembled you can fix your bayonet and shovel, if the show is a D-Day impression you can add the first aid packet to the top left of your haversack strap. We fix the packet to the left shoulder so it doesn’t restrict the position and hold of the rifle when aiming.